How to make an NMR sample
Let our NMR service prepare samples for you or save money by preparing samples yourself.
Samples for full service should be sufficiently soluble in the solvent requested. If not submitting for full service then please prepare your samples as described here. Solid state, semi-solid state and NMR chromatography samples must be submitted for full service. Pre-prepared samples are only accepted for solution state NMR service.
NMR tubes
Samples for NMR analysis should be prepared in 5 mm NMR tubes.
Select the right type of NMR tube. For 400 and 500 MHz NMR tubes of the quality of Wilmad 528-PP-7, Aldrich Z412848, Norell NOR508UP7 or Kontes grade 6 (235) are sufficient. (For boron NMR use Wilmad 528-PP-QTZ if the baseline signal from the tube is a problem.) If the sample dissolves glass (e.g. HF) use a PTFE insert or a Kel-F tube.
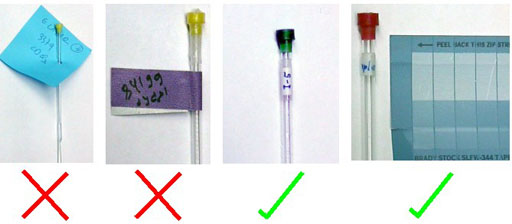
Please label your tubes clearly with an appropriate concentric label (fig. 1).
Fig. 1. Examples of incorrect and correct NMR tube labels
Solvent
Solvent selection is dictated by a number of factors.
- It is general practice to use deuterated solvents for two reasons.
- The deuterium can be used for field frequency lock, making spectral resolution easier to assure and thereby saving you valuable time.
- Solvents containing regular hydrogen yield large signals that may swamp those of your sample: the situation is made worse by saturation effects that broaden large signals. We recommend the use of deuterated solvents wherever possible.
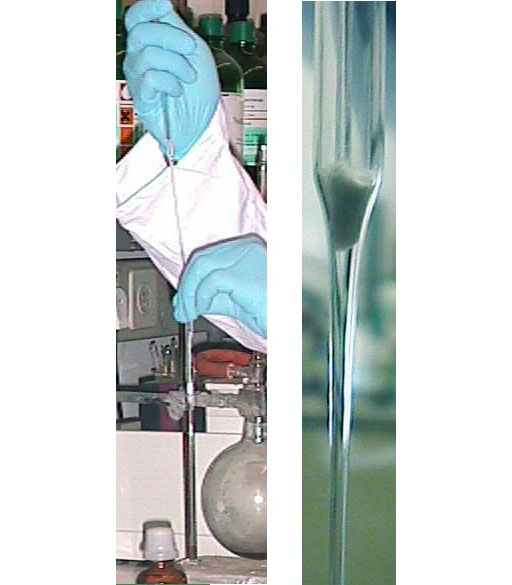
- The sample must be sufficiently soluble (fig. 2) to yield an NMR spectrum. For
1H and 1H observed NMR, it is recommended to dissolve
between 2 and 10 mg in between 0.6 and 1 mL of solvent so that the sample depth is at least 4.5 cm in the tube (fig. 3).
For high molecular weight samples, more concentrated solutions are sometimes recommended. However, too
concentrated a solution leads to lower resolution due to saturation and/or increased viscosity. For
13C NMR between 10 and 50 mg of sample is recommended. If you
do not have enough sample or cannot achieve high enough solubility, it may still be possible to obtain a spectrum
although it is recommended that you request 500 MHz service and the spectrum will take longer to acquire. We have
observed 1H signals with less than 0.1 mg of sample
and 13C signals with less than 1 mg of sample.
Fig. 2. If the sample is not clear for any reason such as poor solubility, a poor spectrum will result
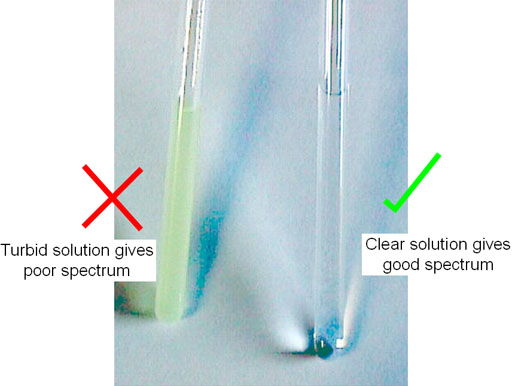
Fig. 3. The sample depth should be 4.5 to 5 cm

- To achieve maximum resolution, choose a solvent with low viscosity. However, achieving higher resolution is more difficult for the operator and likely to increase the service time required. For example, a sample in diethyl ether-d10 will yield a sharper spectrum but may take longer to run than one in DMSO-d6.
- Consider the cost of the solvent. D2O and CDCl3 are the most commonly used solvents in our laboratory because they are the cheapest and yield satisfactory results most of the time.
- If the solvent signals interfere with the sample signals consider a different solvent, changing the temperature or, if the 13C side-bands are overlapping, decoupling the carbon.
- When carrying out variable temperature studies, take into account the liquid range of the solvent. Samples in frozen solvents require solid-state techniques and give poorer spectra although depression of the freezing point is possible in narrow tubes. We do have ways of working at above the boiling point.
Cleanliness
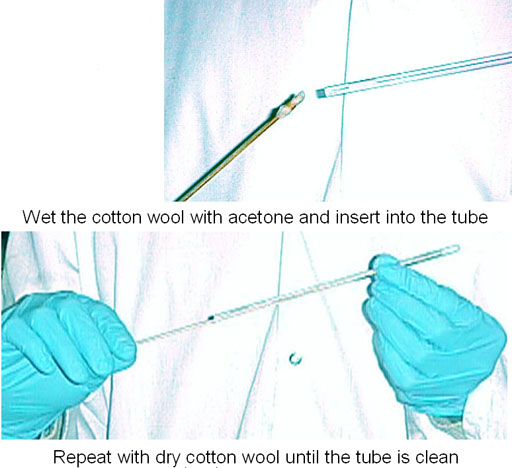
Having selected the solvent and tube one should ensure that the solvent, sample (if not purposely analyzing a mixture), NMR tube (and cap) and anything else that comes in contact with the sample is clean. For routine work, washing the NMR tube using an NMR tube washer (fig. 4) with water and/or acetone then cleaning with cotton wool on a stick followed by thorough drying is sufficient (fig. 5). Do not use a brush or abrasive cleaner in an NMR tube as it will damage the tube and reduce spectral resolution.
Fig. 4. NMR tube washer
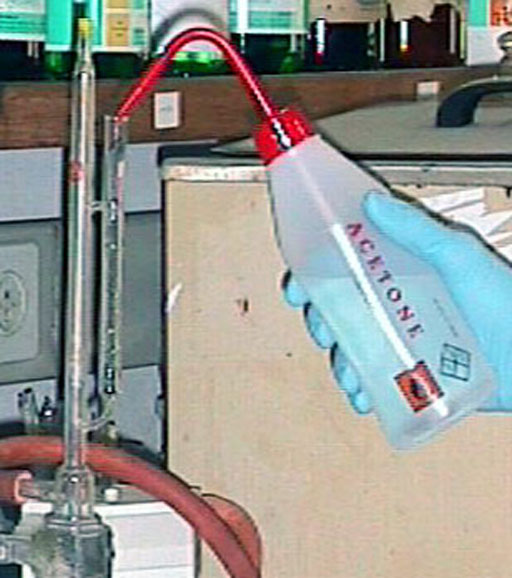
Fig. 5. Cleaning an NMR tube with cotton wool on a stick
Regular cleaning is not always sufficient. If the sample is very dilute, impurities may complicate the spectrum. In such a case, run a blank (spectrum of the pure solvent from the same batch). Sometimes, samples are very sensitive to dirt. For example, certain biological samples require sterile conditions. If the tube is very dirty, normal cleaning may not be sufficient for regular samples. In such cases, NMR tubes (not caps) may be left to soak in aqua regia or sulfurchromic acid (CARE!) for between half an hour and two days then washing several times with distilled water. (Some spectroscopists believe that it is impossible to completely remove the paramagnetic sulfurchromic acid afterwards but I have seen no evidence for this under very demanding conditions provided that the tube is washed at least seven times with distilled water.) The tube should be dried lying on its side (to prevent warping) at up to 150°C for a couple of hours. If the tube is not required immediately then remove it from the oven and return it an hour before use.
Sample filtration
It is important that the solution be free of precipitate, dust, fibers, etc. This can be achieved by filtering the sample. Make up slightly more sample than is required. Pack a small piece of cotton or glass wool tightly into a Pasteur pipette and wash with a small amount of solvent. Filter the solution into the NMR tube using a teat if necessary to force the sample through (fig. 6).
Fig. 6. Filtering an NMR sample
Preventing contamination from the cap
The tube cap may contaminate the sample. Even a new cap releases materials (fig. 7) especially when the solvent is CDCl3 or DMSO-d6. In order to prevent this it is recommended to close the tube with Teflon tape (fig. 8) and afterwards with the cap (fig. 9). Do not invert the tube but mix with a vortex mixer (fig. 10) for a whole minute. If the solution is more viscous than water, more time is needed. Alternatively, use a special Teflon tube cap.
For long experiments or medium term storage, Parafilm tape may be wrapped concentrically around the base of the cap.
Fig. 7. Comparison of the proton NMR spectra of CDCl3 in new NMR tubes. The lower one is closed with Teflon tape and was not inverted and the upper one is without Teflon tape after inversion for ¼ hour. The use of Teflon and not inverting reduces the contamination by a factor of about 200.
Fig. 8. Mixing the sample with a vortex mixer
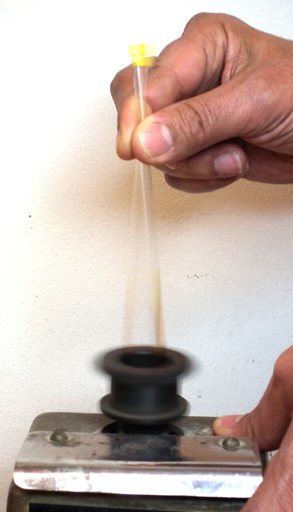
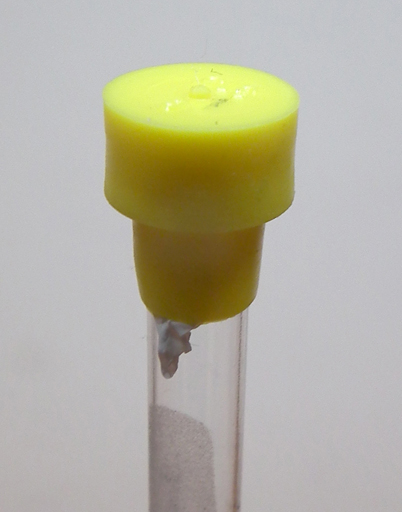
Fig. 9. NMR tube closed with Teflon tape
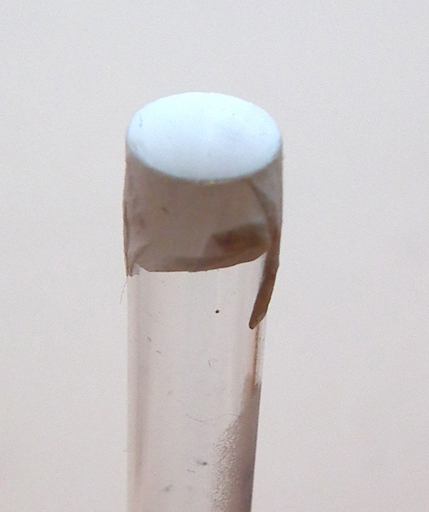
Fig. 10. NMR tube closed with a cap over Teflon tape
Air sensitive and high-pressure samples
An inert atmosphere or vacuum is required if the sample is air sensitive, or a relaxation (T1 or T2) measurement is desired. If NOE is being sought then using an inert atmosphere increases sensitivity. Oxygen in the air is slightly paramagnetic so reduces relaxation times and reduces NOE hence the need for removing oxygen in some cases.
The simplest way of achieving this is to make up the sample under argon and running the spectrum immediately. It is recommended that such samples be submitted only by prior arrangement to our NMR service otherwise we cannot guarantee to run them quickly enough. Special NMR tubes are commercially available for sealing samples under vacuum or an inert atmosphere such as Wilmad's 528-JY tubes. An alternative is to attach a glass tube to the top of a regular NMR tube with a constriction fig. 11. Care must be taken to maintain concentricity. The sample may be made up on a vacuum line and the tube then cut with a flame. A partial pressure of inert gas makes cutting easier but with practice it can also be done with a vacuum. To remove all gas, the sample should be frozen pumped and thawed repeatedly. To thaw the sample heat the outer layers to well above the melting point quickly otherwise the tube may break.
Fig. 11. Sample tubes for air sensitive and high pressure work
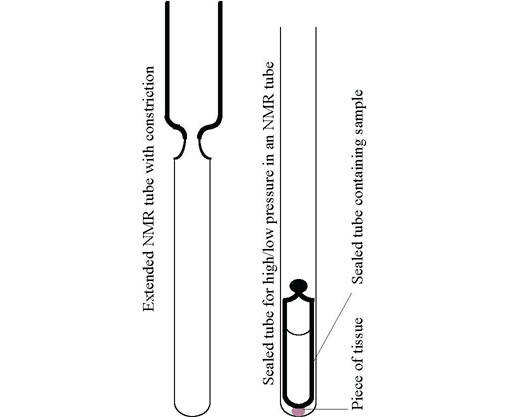
High-pressure samples up to 50 atmospheres can be sealed in thick-walled NMR tubes of the type Wilmad 522-PP. However, if heating is required, the sample may boil up the tube and out of the probe. An alternative is to use short, sealed 4 mm tubes placed in a 5 mm tube. A tiny piece of tissue paper in the bottom of the outer tube makes it less likely to break. There is, however, a slight loss in resolution. If the sample is to be heated, ensure that there is enough room for the solution to expand. Extreme caution must be taken to anneal the tube properly when sealing it otherwise it may explode. An exploding tube in the probe can be VERY expensive. Please ask permission before submitting such samples to our NMR service or running such samples on our instruments.
Preparing solid & semi-solid state NMR samples
The rotors and their accessories for solid state NMR are very expensive. Please be careful not to lose or damage them.
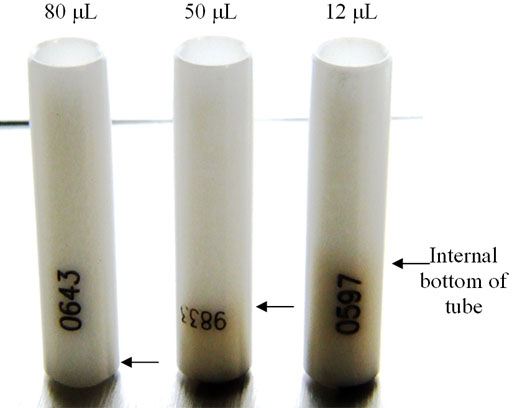
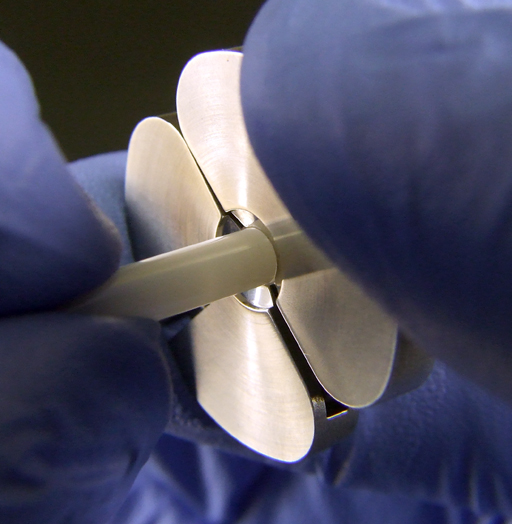
The tube used for magic angle spinning (MAS) is small and white (fig. 12) and is called a rotor. There are three main types: full 80 μL usually for solids and 50 and 12 μL for semi-solids.
Fig. 12. Rotors (special tubes) for MAS
For CRAMPS experiments use a special CRAMPS rotor (fig. 13).
Fig. 13. CRAMPS rotor
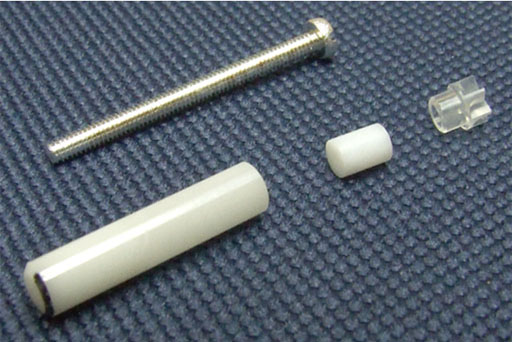
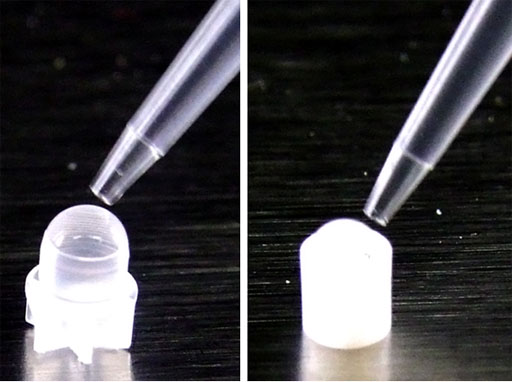
Special inserts (fig. 14) are used for the 12 and 50 μL rotors. The inserts are made from two materials, teflon (white) and Kel-F (transparent).
Choose the material that best matches the susceptibility of your material. If the sample is highly diamagnetic like water or chloroform then use teflon. If it is less diamagnetic like alcohol, DMSO or acetone then use Kel-F. The inserts are designed for use with liquid or soft samples. Do not use an insert with solid material except for CRAMPS.
Fig. 14. Caps and inserts for MAS rotors
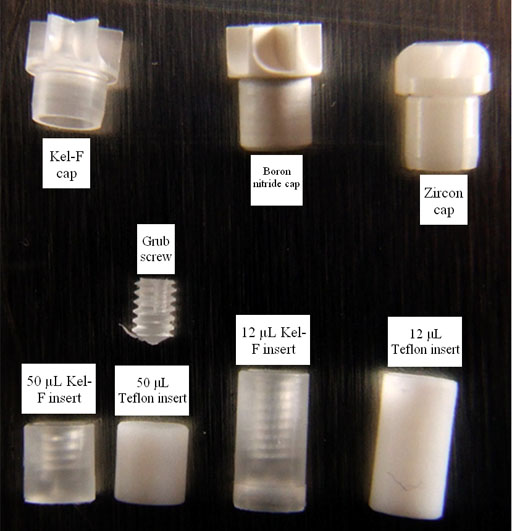
There are three types of caps (fig. 14): clear (Kel-F) for temperatures not far from room temperature (–20°C to 50°C), and white (boron nitride of zircon) for more extreme temperatures (–50°C to 120°C). The Boron nitride cap is very fragile and virtually unusable. The zircon cap is recommended for extreme temperatures because it is more durable that boron nitride. For solid state (except CRAMPS), is more durable that boron nitride. For solid state (except CRAMPS), if there is not enough material, do not use restricted tubes but it is better to dilute the sample with something inorganic such as silica, alum or calcium sulphate. The restricted tubes are designed for soft samples and hard samples may damage them.
Use gloves to prevent contamination with lipids (oils) from the skin that give NMR signals under MAS conditions.
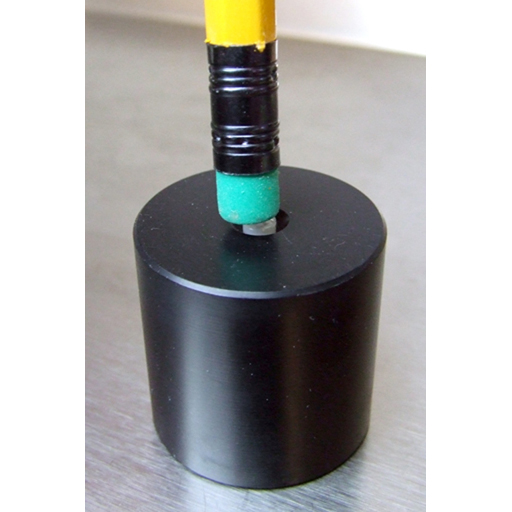
For solid samples, grind them up with a mortar and pestle (fig. 15). Place the rotor in its stand and put the powder in stages with a small spatula (fig. 16). Compress the powder after each stage using the long part of the special tool (fig. 17). Fill the rotor up to the cap's place. If the sample is correctly prepared it should spin up to a speed of 15 kHz.
Fig. 15. Grinding up the sample with a pestle and mortar
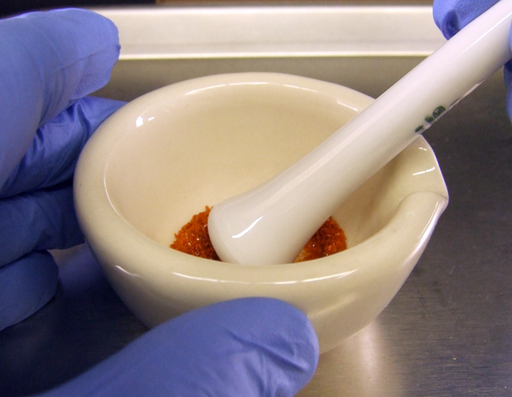
Fig. 16. Putting the sample in its stand and putting the powder into the rotor
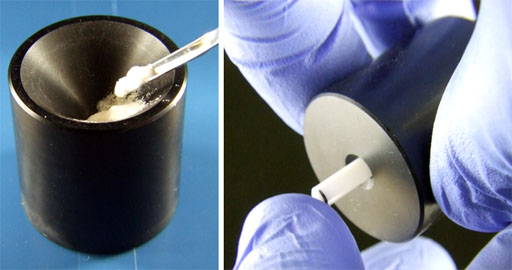
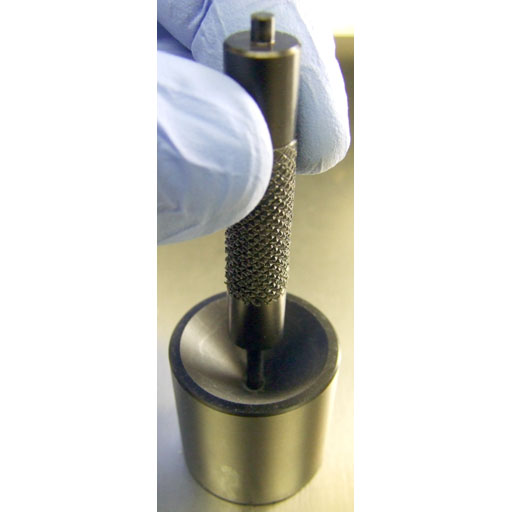
Fig. 17. Compressing the sample with the special tool. Use the long end.
For liquids and gels the insert reduces the risk of bubbles that compromise resolution. If the density of the liquid is known then the rotor, insert and screw can be weighed before and after filling to confirm that there are no bubbles. For soft samples such as biological tissue, the inserts hold the sample exactly in place.
Liquids or solids that can be easily melted should be inserted with an automatic 100 μL pipette or with a syringe (fig. 18). If using an insert, put a drop of sample on the bottom of the insert and if not put a drop under the cap (fig. 19).
Fig. 18. Inserting a liquid sample with an automatic pipette
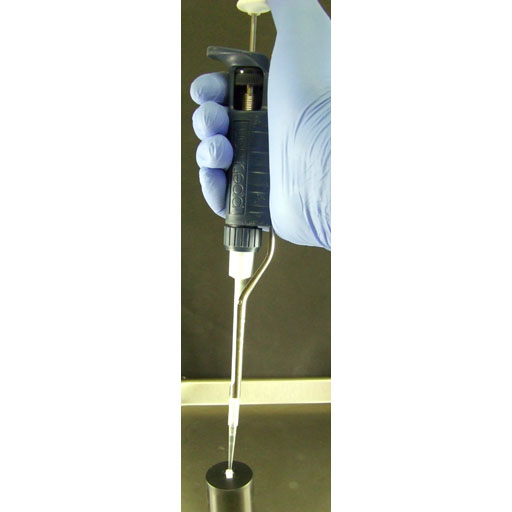
Fig. 19. Placing a drop on the bottom of the insert or cap
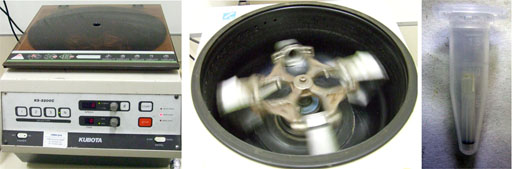
For biological samples such as cell membranes or proteins, use a 12 μL rotor and add 5-10% D2O. Place the pellet in the bottom of the rotor. The rotor can be placed in the bottom of an Eppendorf tube and spun in a swing-out centrifuge (fig. 20). A centrifuge should also be used to remove bubbles from gels, resins and liquid crystals.
Fig. 20. A rotor in an Eppedorf tube. The sample in a centrifuge. Close the centrifuge when in use.
For resins and other swelling samples, check the swelling ratio for the solvent (typically 5). Calculate the amount of solid sample required to fill the rotor (12 or 50 μL) after swelling. Mix with a pin. If using an insert, put a drop of sample on the bottom of the insert and if not put a drop under the cap (fig. 21).
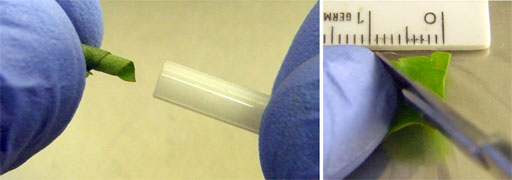
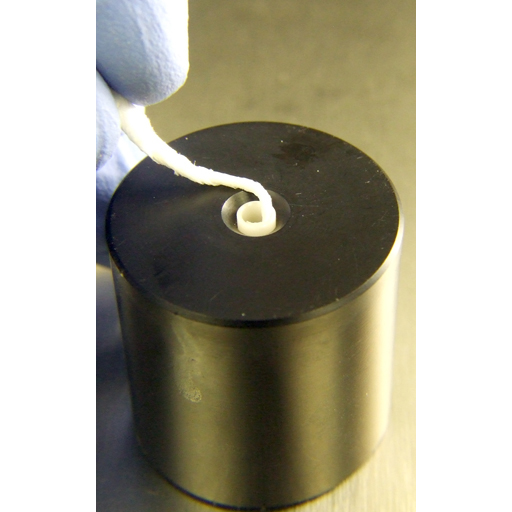
For food and tissue samples, wash with D2O (fig. 18). Cut the sample to size with a scalpel (figs. 21 and 22): a 2.84 mm sphere for 12 μL and a 2.95 mm diameter cylinder of length 7.3 mm for 50 μL. Flat samples such as leaves should be cut and rolled up (fig. 22). Fill the rotor with D2O. Place a drop of D2O on the bottom of the insert.
Fig. 21. Preparing a biological sample (e.g., red pepper): washing with D2O, cutting to size and inserting into the rotor.
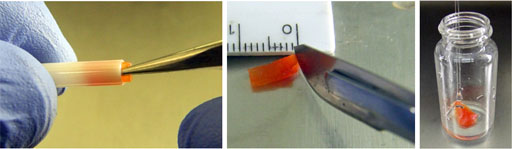
Fig. 22. Preparing a flat biological sample (e.g., leaf): cutting to size, rolling up and inserting into the rotor.
If using an insert put it in with the thread uppermost. Push it in with the short (3 mm long) end of the compression tool (fig. 23). If you push it too far you may damage the insert (fig. 24). Insert the screw using the appropriate screwdriver (figs. 25-27). It may help to use a magnifying lamp (fig. 28). Turn the screw until you feel extra resistance. Clean the open top of the rotor (fig. 29) with a Kimwipe tissue.
Fig. 23. Putting the insert in with the compression tool. Use the long end.
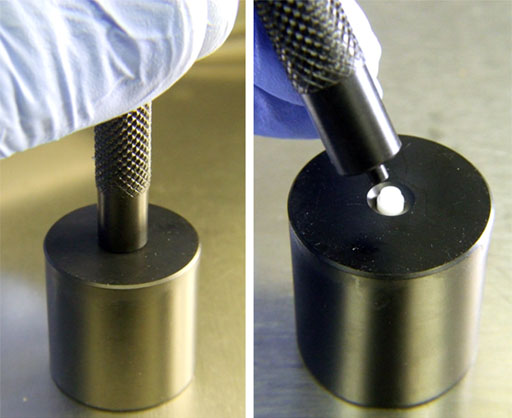
Fig. 24. Inserts the on the right is damaged by being pushed in too far
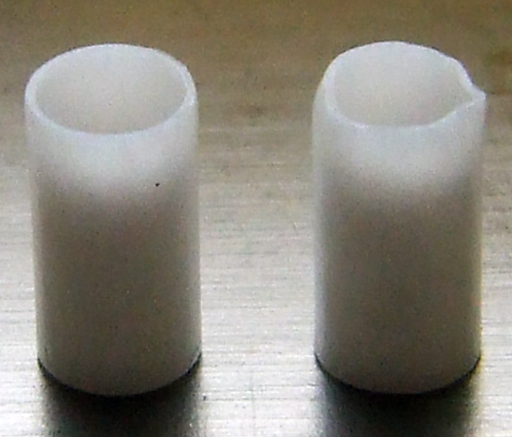
Fig. 25. Special screwdriver for the grub screws (for the other type use a very small flat screwdriver)

Fig. 26. Two types of grub screws and their screwdriver tips
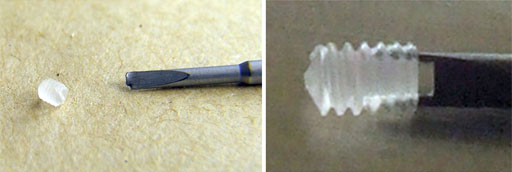
Fig. 27. Inserting the grub screws, the use of a magnifying lamp is recommended
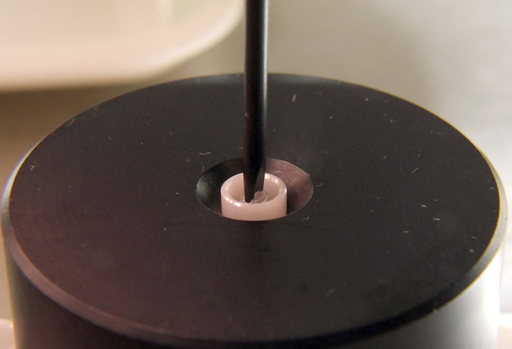
Fig. 28. Use of a magnifying lamp
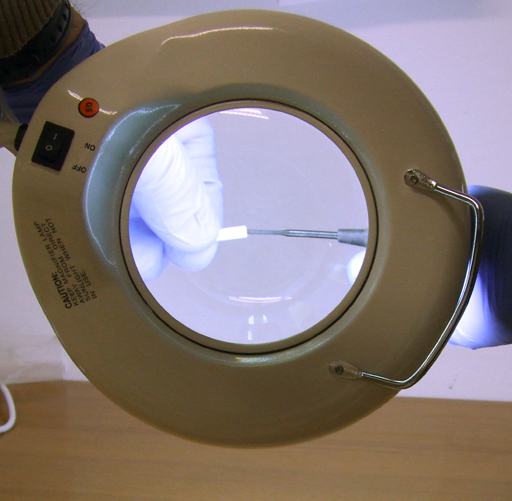
Fig. 29. Cleaning out the top with a Kimwipe tissue
Check that the cap is not damaged (fig. 30) before inserting it. Inhomogeneity of the sample or a damaged cap can destroy the rotor (fig. 31) and the probe. Insert the cap as far as it will go (fig. 32). It is important to ensure that the cap is undamaged and that it is not loose. You can improvise a soft tool to push the cap in (fig. 33).
Fig. 30. Rotor caps showing damage caused by misuse of the cap removal tool
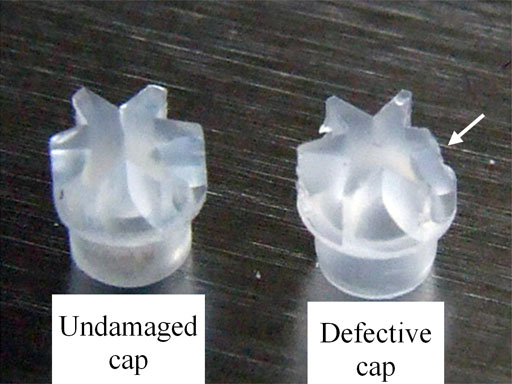
Fig. 31. A complete rotor next to the remains of a rotor that exploded
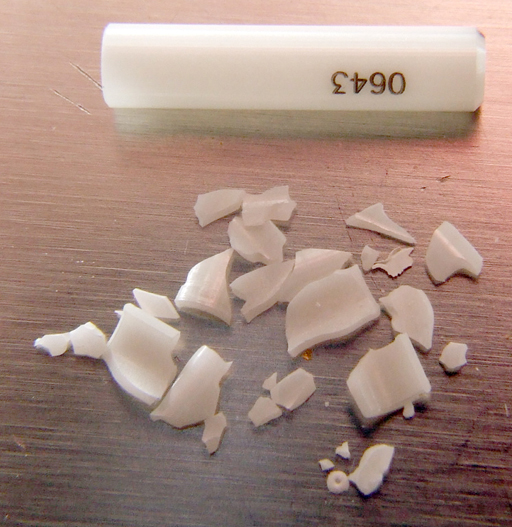
Fig. 32. Inserting a cap
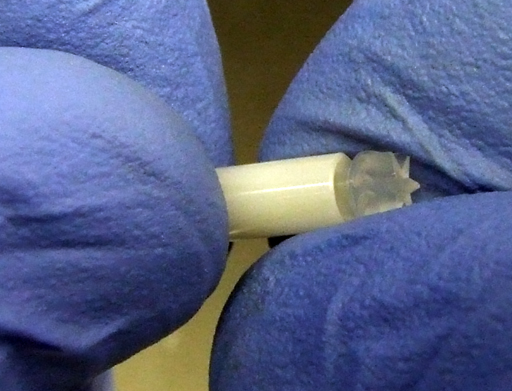
Fig. 33. Closing the cap with a soft utensil
Cleaning solid and semi-solid state samples
When dismantling and cleaning out the samples one must be very careful not to lose parts.
Remove the cap. It is best to remove a Kel-F cap by cooling the rotor thus reducing the risk of damaging the cap (fig. 34). When the rotor is cold you can remove it by hand. Zircon or other caps use the special cap removal tool (fig. 35).
Fig. 34. Cooling a rotor to remove the cap
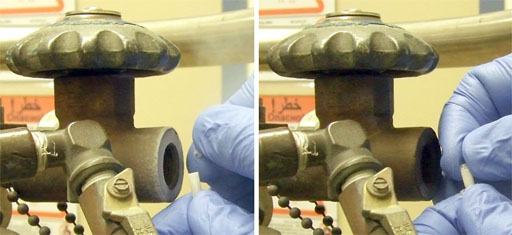
Fig. 35. Removing the cap with the cap removal tool
If there is an insert, remove it. Put in the appropriate screwdriver and unscrew the grub screw (fig. 36). Insert the special screw untill you feel resistance and pull ou the insert (fig. 37).
Fig. 36. Unscrewing the grub screw
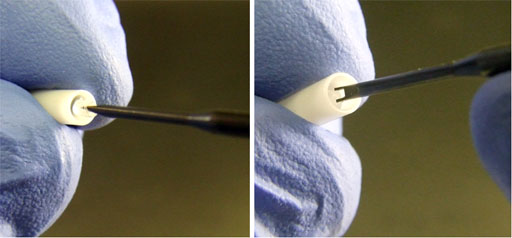
Fig. 37. Removing the insert with the metal screw

If the sample is solid or semi-solid remove it from the rotor with a spatula (fig. 38). Wash the rotor, cap, insert, grub screw and the tools with distilled water and acetone and if necessary another solvent (fig. 39). Put all the parts in acetone in an ultrasound bath for three minutes (fig. 40). Dry all the parts with a Kimwipe tissue (fig. 41) and then in an oven at 65°C (not more otherwise the caps and inserts will be destroyed) for 20 minutes (fig. 42).
Fig. 38. Removing a solid sample from a rotor using a spatula
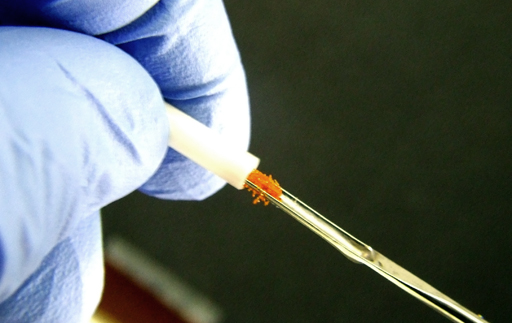
Fig. 39. Washing the rotor
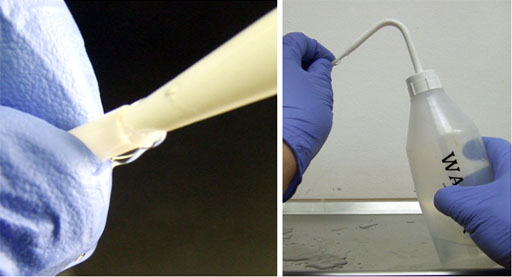
Fig. 40. Use of an ultrasound bath for cleaning parts in acetone
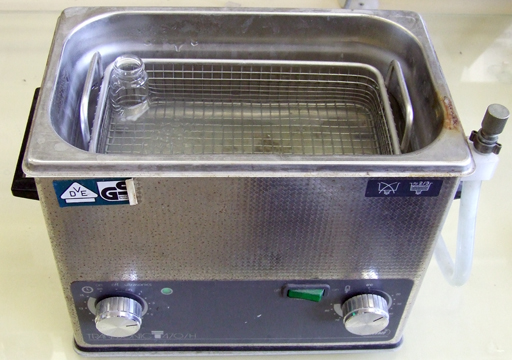
Fig. 41. Drying parts with a Kimwipe tissue
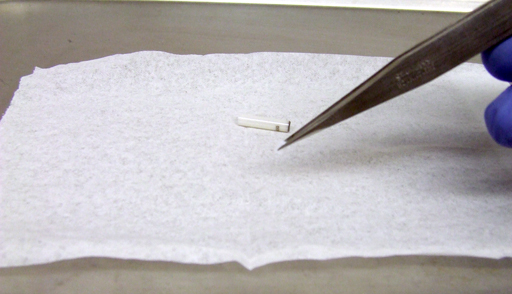
Fig. 42. Putting parts in an oven

Safety note:
Some of the procedures described here are potentially dangerous. If you are unfamiliar with laboratory safety, please ask a qualified chemist for help.